Sut i dynnu sylw at gell neu res gyda blwch gwirio yn Excel?
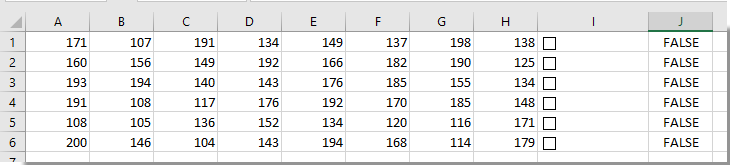
Fel y dangosir isod y llun, mae angen i chi dynnu sylw at res neu gell gyda blwch gwirio. Pan fydd blwch gwirio yn cael ei wirio, bydd rhes benodol neu gell yn cael ei hamlygu'n awtomatig. Ond sut i'w gyflawni yn Excel? Bydd yr erthygl hon yn dangos dau ddull i chi ei gyflawni.

Tynnwch sylw at gell neu res gyda blwch gwirio gyda Fformatio Amodol
Tynnwch sylw at gell neu res gyda blwch gwirio gyda chod VBA
Tynnwch sylw at gell neu res gyda blwch gwirio gyda Fformatio Amodol
Gallwch greu rheol Fformatio Amodol i dynnu sylw at gell neu res gyda blwch gwirio yn Excel. Gwnewch fel a ganlyn.
Cysylltwch yr holl flwch gwirio â chell benodol
1. Mae angen i chi fewnosod blychau gwirio mewn celloedd fesul un â llaw trwy glicio Datblygwr > Mewnosod > Blwch Gwirio (Rheoli Ffurflen).
2. Nawr bod blychau gwirio wedi'u mewnosod mewn celloedd yng ngholofn I. Dewiswch y blwch gwirio cyntaf yn I1, nodwch y fformiwla = $ J1 i mewn i'r bar fformiwla, ac yna pwyswch y Rhowch allweddol.
Tip: Os nad ydych am gael gwerthoedd sy'n gysylltiedig mewn celloedd cyfagos â blychau gwirio, gallwch gysylltu'r blwch gwirio â chell taflen waith arall fel = Taflen3! $ E1.

2. Ailadroddwch gam 1 nes bod yr holl flychau gwirio wedi'u cysylltu â'r celloedd neu'r celloedd cyfagos mewn taflen waith arall.
Nodyn: Dylai'r holl gelloedd cysylltiedig fod yn olynol ac wedi'u lleoli yn yr un golofn.
Creu rheol Fformatio Amodol
Nawr mae angen i chi greu rheol Fformatio Amodol fel a ganlyn gam wrth gam.
1. Dewiswch y rhesi y mae angen i chi dynnu sylw atynt gyda blychau gwirio, yna cliciwch Fformatio Amodol > Rheol Newydd O dan y Hafan tab. Gweler y screenshot:

2. Yn y Rheol Fformatio Newydd blwch deialog, mae angen i chi:
2.1 Dewiswch y Defnyddiwch fformiwla i bennu pa gelloedd i'w fformatio opsiwn yn y Dewiswch Math o Reol blwch;
2.2 Rhowch y fformiwla = OS ($ J1 = GWIR, GWIR, GAU) i mewn i'r Gwerthoedd fformat lle mae'r fformiwla hon yn wir blwch;
Or = OS (Taflen3! $ E1 = GWIR, GWIR, GAU) os oedd y blychau gwirio yn gysylltiedig â thaflen waith arall.
2.3 Cliciwch y fformat botwm i nodi lliw wedi'i amlygu ar gyfer y rhesi;
2.4 Cliciwch y OK botwm. Gweler y screenshot:

Nodyn: Yn y fformiwla, $ J1 or $ E1 yw'r gell gysylltiedig gyntaf ar gyfer y blychau gwirio, a gwnewch yn siŵr bod cyfeirnod y gell wedi'i newid i golofn absoliwt (J1> $ J1 or E1> $ E1).
Nawr mae'r rheol Fformatio Amodol yn cael ei chreu. Wrth wirio'r blychau gwirio, bydd y rhesi cyfatebol yn cael eu hamlygu'n awtomatig fel y dangosir llun megin.

Tynnwch sylw at gell neu res gyda blwch gwirio gyda chod VBA
Gall y cod VBA canlynol hefyd eich helpu i dynnu sylw at gell neu rwyfo gyda blwch gwirio yn Excel. Gwnewch fel a ganlyn.
1. Yn y daflen waith mae angen i chi dynnu sylw at gell neu res gyda'r blwch gwirio. De-gliciwch y Tab Dalen a dewis Gweld y Cod o'r ddewislen clicio ar y dde i agor y Microsoft Visual Basic ar gyfer Ceisiadau ffenestr.
2. Yna copïwch a gludwch y cod VBA isod i mewn i ffenestr y Cod.
Cod VBA: Rhes uchafbwynt gyda blwch gwirio yn Excel
Sub AddCheckBox()
Dim xCell As Range
Dim xRng As Range
Dim I As Integer
Dim xChk As CheckBox
On Error Resume Next
InputC:
    Set xRng = Application.InputBox("Please select the column range to insert checkboxes:", "Kutools for Excel", Selection.Address, , , , , 8)
If xRng Is Nothing Then Exit Sub
If xRng.Columns.Count > 1 Then
    MsgBox "The selected range should be a single column", vbInformation, "Kutools fro Excel"
    GoTo InputC
Else
    If xRng.Columns.Count = 1 Then
        For Each xCell In xRng
            With ActiveSheet.CheckBoxes.Add(xCell.Left, _
               xCell.Top, xCell.Width = 15, xCell.Height = 12)
               .LinkedCell = xCell.Offset(, 1).Address(External:=False)
               .Interior.ColorIndex = xlNone
               .Caption = ""
               .Name = "Check Box " & xCell.Row
            End With
            xRng.Rows(xCell.Row).Interior.ColorIndex = xlNone
        Next
    End If
    With xRng
     .Rows.RowHeight = 16
    End With
    xRng.ColumnWidth = 5#
    xRng.Cells(1, 1).Offset(0, 1).Select
    For Each xChk In ActiveSheet.CheckBoxes
      xChk.OnAction = ActiveSheet.Name + ".InsertBgColor"
    Next
End If
End Sub

Sub InsertBgColor()
Dim xName As Integer
Dim xChk As CheckBox
For Each xChk In ActiveSheet.CheckBoxes
  xName = Right(xChk.Name, Len(xChk.Name) - 10)
  If (xName = Range(xChk.LinkedCell).Row) Then
   If (Range(xChk.LinkedCell) = "True") Then
    Range("A" & xName, Range(xChk.LinkedCell).Offset(0, -2)).Interior.ColorIndex = 6
   Else
    Range("A" & xName, Range(xChk.LinkedCell).Offset(0, -2)).Interior.ColorIndex = xlNone
   End If
  End If
Next
End Sub
3. Gwasgwch y F5 allwedd i redeg y cod. (Nodyn: dylech roi'r cyrchwr yn rhan gyntaf y cod i gymhwyso'r allwedd F5) Wrth popio i fyny Kutools ar gyfer Excel blwch deialog, dewiswch yr ystod rydych chi am ei mewnosod blychau gwirio, ac yna cliciwch ar y OK botwm. Dyma fi'n dewis ystod I1: I6. Gweler y screenshot:

4. Yna rhoddir blychau gwirio mewn celloedd dethol. Gwiriwch unrhyw un o'r blychau gwirio, bydd y rhes gyfatebol yn cael ei hamlygu'n awtomatig fel y dangosir isod.

Erthyglau perthnasol:
- Sut i newid gwerth neu liw cell penodedig pan fydd blwch gwirio yn cael ei wirio yn Excel?
- Sut i fewnosod stamp dyddiad mewn cell os ticiwch flwch gwirio yn Excel?
- Sut i wirio blwch gwirio yn seiliedig ar werth celloedd yn Excel?
- Sut i hidlo data yn seiliedig ar flwch gwirio yn Excel?
- Sut i guddio blwch gwirio pan fydd rhes wedi'i chuddio yn Excel?
- Sut i greu rhestr ostwng gyda blychau gwirio lluosog yn Excel?
Offer Cynhyrchiant Swyddfa Gorau
Supercharge Eich Sgiliau Excel gyda Kutools ar gyfer Excel, a Phrofiad Effeithlonrwydd Fel Erioed Erioed. Kutools ar gyfer Excel Yn Cynnig Dros 300 o Nodweddion Uwch i Hybu Cynhyrchiant ac Arbed Amser. Cliciwch Yma i Gael Y Nodwedd Sydd Ei Angen Y Mwyaf...
")
Mae Office Tab yn dod â rhyngwyneb Tabbed i Office, ac yn Gwneud Eich Gwaith yn Haws o lawer
- Galluogi golygu a darllen tabbed yn Word, Excel, PowerPoint, Cyhoeddwr, Mynediad, Visio a Phrosiect.
- Agor a chreu dogfennau lluosog mewn tabiau newydd o'r un ffenestr, yn hytrach nag mewn ffenestri newydd.
- Yn cynyddu eich cynhyrchiant 50%, ac yn lleihau cannoedd o gliciau llygoden i chi bob dydd!
")